When you are ready to start building your course site in Blackboard, the first thing to do is contact your academic director to ask if there is a course template you should use. (See Module 4 for more about this aspect of planning.) Remember to build your course in the DEV site, and not your live semester site. Both your DEV and live site should be available to you from your Blackboard Home Page. You can tell that you are working in your DEV site because the course title on your Blackboard Home Page and displayed in the upper left-hand corner of the course site will read “(DEV)” after the course title. It’s a good idea to build out one week in its entirety first and then review it to see if there is anything you’d like to change going forward. 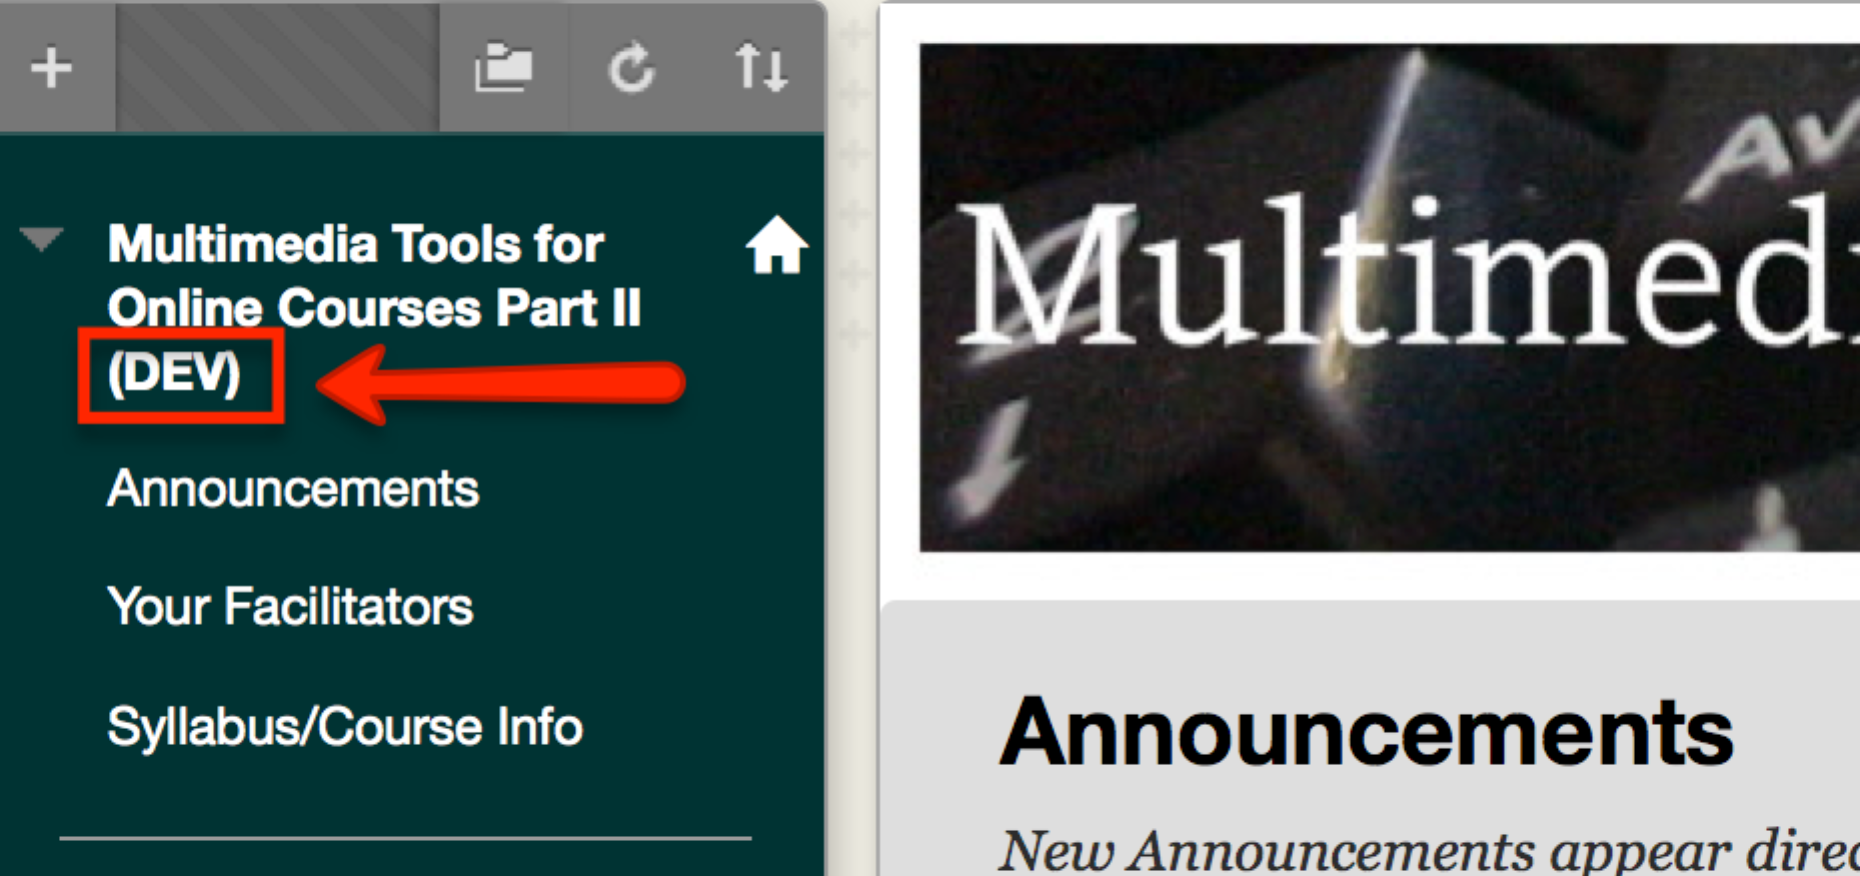
Course Essentials
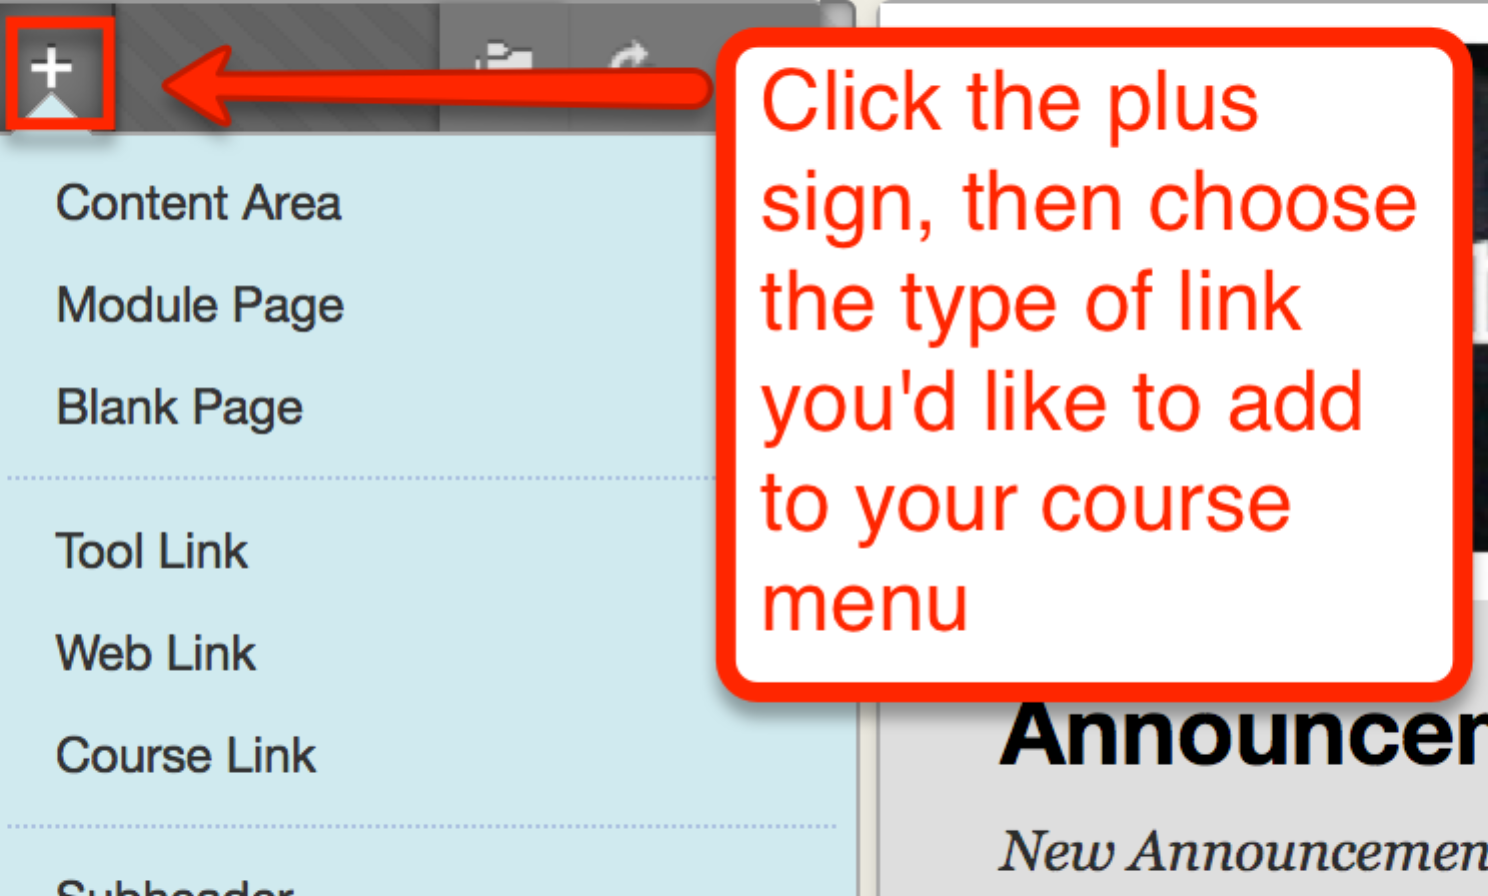
Every course must have a few essential elements: an announcement, instructor information, a syllabus/ course schedule, course content organized into weekly units, and a grade center. Each of these elements should be accessible from the main course menu that appears to the left of your course page. To add a link to the course menu, click on the plus sign in the upper left-hand corner of the course menu and add the type of link you’d like to add to your course menu. The most basic type of page you will use the most often is a “Content Area.”
Adding an Announcement
Announcements allow you to provide general information to your students, give updates. and create reminders. You have the option to display announcements after or until a particular date and to email a copy of the announcement to all course users. By default, your course-entry page will be the announcement page with the most recent announcement displayed at the top. You must create a welcome announcement for your course to be displayed on the first day of the semester. In order to create an announcement, click on “Create Announcement” at the top of the page.

Adding Instructor Information
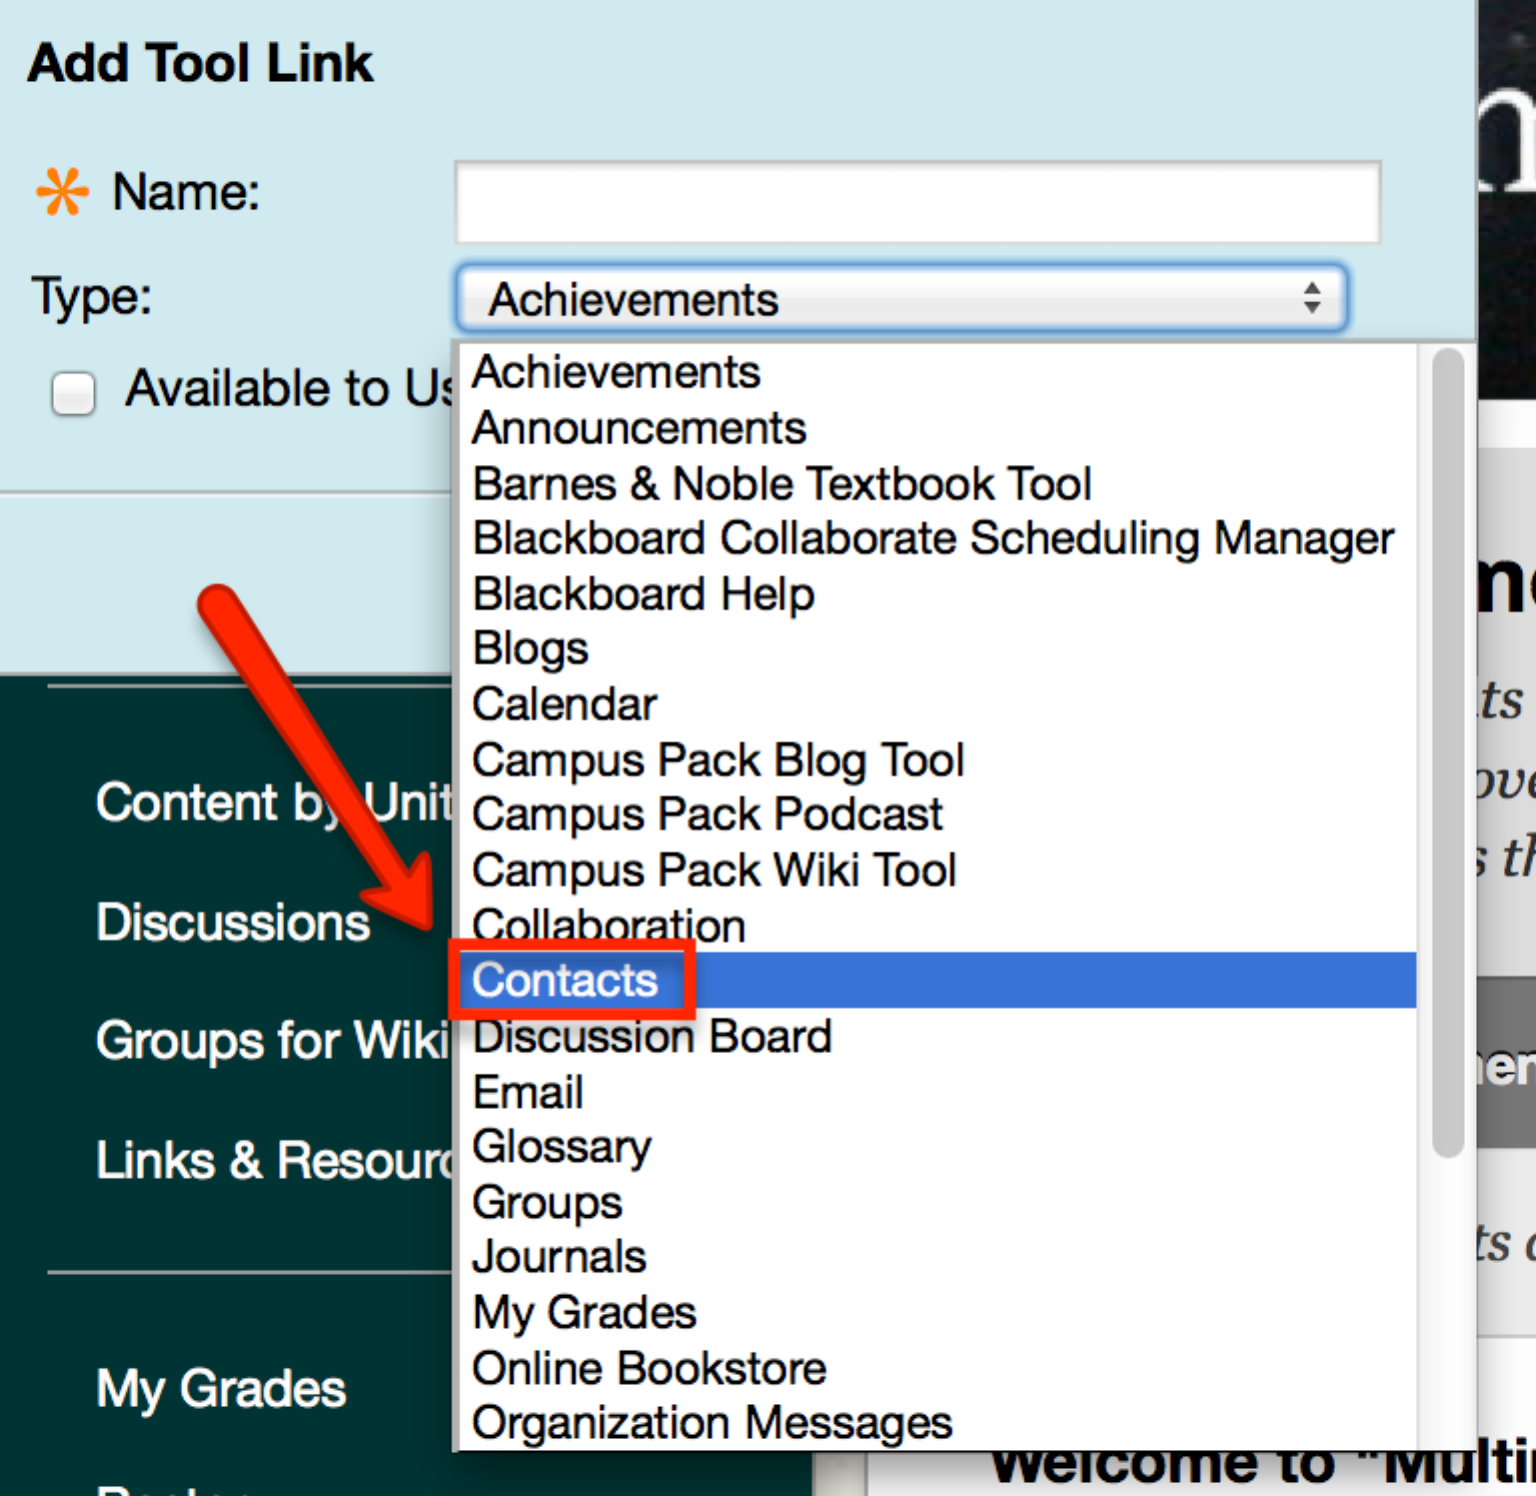
To add your information, click the plus sign in the upper right-hand corner of the course menu and click “Tool Link.” Then, click on “Contacts” in the pop up window and name your link (something like “Instructor Information”). Enter the page by clicking on the link’s name in the course menu and then click “Create Contact” to add your information. There is a guide available that explains how to resize your profile picture and add an avatar. 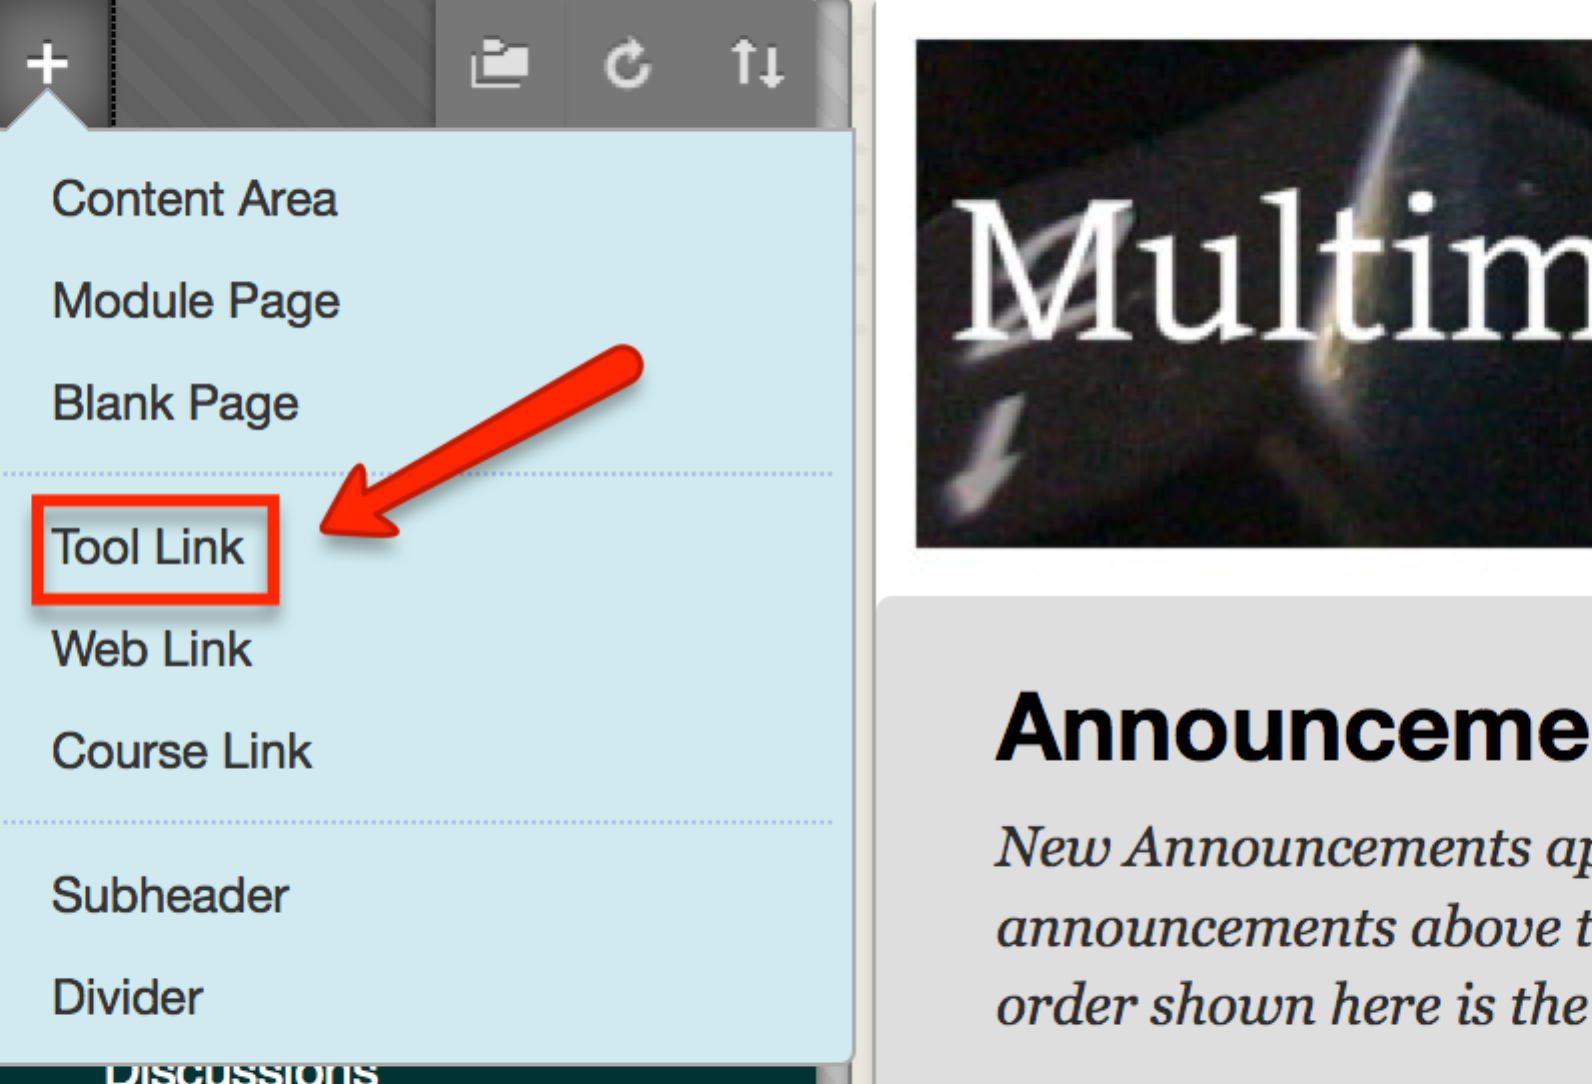

Adding your Syllabus
To upload your syllabus, add a course content link to the main course menu named “Course Syllabus/Information.” Click on the link to enter the page and then click “Build Content” in the upper left hand corner of the page. Choose “Item” from the drop down menu and upload your syllabus. You may want to add a separate item to this page that displays just the course schedule by adding an item and then cutting and pasting the schedule into the text editor.
Organizing Course Content
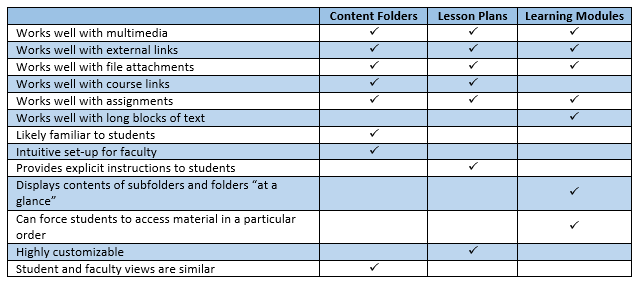
You have three options for organizing your course content by week, each of which has its advantages and disadvantages depending on your course content and teaching style. Again, if your program has adopted a template, it may be that you are required to use a specific organization method, so be sure to check.
- Folders: The simplest way to organize course content is in weekly folders. You can create Course Files folders and sub-folders similar to the way you create them in Word. For more information on Folders, see this Blackboard help page.
- Lesson plans: Lesson plans pair a content folder with customizable information about its contents. By default, this information is only available to the instructor and mimics the role of a traditional lesson plan, providing the instructor with an outline of what should be done with the materials in the content folder. If it is made available to students, however, this information creates a heading for the folder that can include directions for an activity, a to-do list for the week, or any other information the instructor deems pertinent. This can be very helpful with assignments that have several steps or are not self-explanatory. For step-by-step instructions on how to use Lesson Plans, see our quick guide.
- Learning Modules: Learning modules organize course materials in a particular order and will display just one piece of content (such as an item, file, or video) at a time, thereby only allowing students to progress sequentially through the module’s content. The content in a Learning Module is generally organized in a table of contents, which also displays links to all the content of any subfolder you include in a module. These qualities make Learning Modules well suited for units that must be completed in a specific sequence, or are particularly text-heavy, or have many subfolders that would benefit from a bird’s-eye view. Finally, they also encourage students to slow down and focus on each individual piece of content. For step-by-step instructions on how to use Learning Modules, see our quick guide.
To help you determine the best option for organizing your content, here’s a handy chart comparing the three options:
Discussion
See the guide for “Creating and Using the Discussion Board.” When creating your discussion fora, keep in mind the following:
- Keep your naming conventions consistent and easy to follow—as mentioned in Module 7, these should follow the outline of your course topics or units. Naming by week or module, as in “Week 1 forum, Module 2 forum,” etc. is clear and easy to follow. If you want to add a topical subtitle that is fine, as in “Week 1: Historic Background, Week 2, The Early Period.” Or if students are asked to submit and share an assignment in a forum, you might name the forum by that assignment, as in “Assignment 3 Forum,” “Collaborative group assignment 3.”
- Use the Forum description area judiciously so as to be clear and to the point—you can add your questions in the description area or add them inside as threads. However, try to keep text to a minimum. Due to the way this description area is formatted, if you have more than a paragraph or two of text in the forum description area, it pushes all the other fora beyond screen level and forces students to continually scroll down to read—if you have a more lengthy set of instructions, consider referring to a more detailed document in another area. (For example, “See the description in the Assignment area for additional instruction,” or “Please read the background information under Course Materials, week 2, before posting your response.”) A few Blackboard discussion board forum settings are important to note here, because they have the potential for such a positive or negative effect on discussions.
- Viewing Threads/Replies—The default is “Standard View” but the option to have students post a response (also called the “Post First” option) before viewing other students’ responses is available. This is an option one might want to use if you are asking students to post their work in a forum but do not want them to read others’ work before providing their own. Be aware that when you choose this option that some of the other options described below will automatically show up under settings as options not available to you.
- Anonymous posting—there is almost no reason why you would ever want to allow this so be sure “Allow anonymous posts” is left unchecked
- Editing and Deleting—There are options for the author of a post to remove (delete) or edit their own postings. You may want to allow students to remove their own posts (they may make a mistake or post in a hurry and regret soon after), but if you do so, be sure to leave the secondary option at the default checked, “Only posts with no replies.” This option is generally not recommended for graded discussion posts. There is also an option for the author of a post to be able to “edit” a post—“Allow author to edit own published posts.” When your students use this option to edit their postings, you will see only see the original and edited dates if you view through the Grade Center. So you may not want to allow edits in some forums if you have graded discussion or assignments posted for which the due date is not otherwise controlled by Bb settings because other students in the discussion forum (and you for that matter) will not see that this posting has been edited unless they remember the original date of the posting, which is highly unlikely. At the very least, this could make some discussions less coherent when revisited after students have edited their original responses.
- “Allow users to reply with quotes,” “allow file attachments,” are helpful options in nearly every instructional situation. When students use “reply with quotes” it is easier to follow the conversation.
- Subscribe–“Allow members to subscribe to forum,” permits students to receive emails when new postings are made. It does not force students to do so, but it allows them to make that choice so should always be allowed.
Below, the Settings area of the Discussion Board feature: 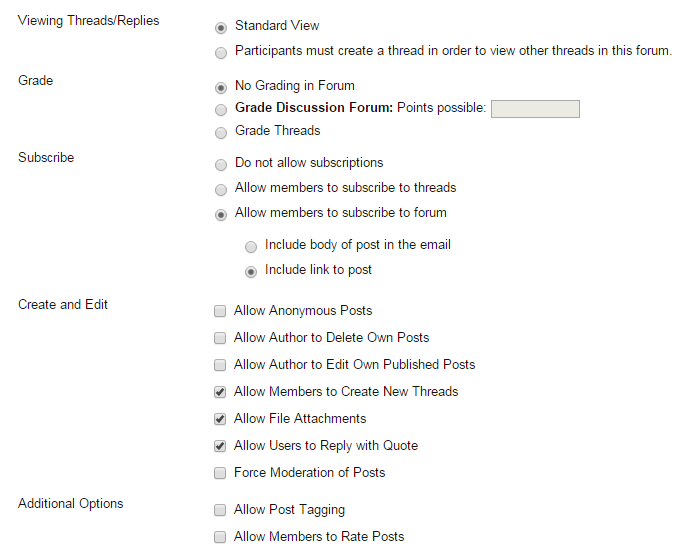
Grade Center
You should organize/build your Grade Center last. Make sure that all the assignments you created in Blackboard have grading enabled. This will automatically create a column in your Grade Center. To check the settings of an assignment, click on the downward facing arrow that appears next to the assignment’s name on the course page where it is located and click “Edit.” For information on how to build and organize your Grade Center, see our Quick Guide.
Accessibility
To help make higher education available to as many students as possible, CUNY SPS supports course design that upholds the principles of accessibility and universal design. See the Accessibility Module or the quick guide on “Accessibility and Universal Design in Learning” for more details, but when building your course site, keep the following guidelines in mind to ensure your Blackboard site is accessible to all learners:
- Use descriptive names for files you upload so that screen readers can easily identify them.
- Avoid using colored fonts to enhance meaning as much as possible. Keep the format simple and avoid patterns in the background.
- When designing the left navigation menu in your course site, set the menu style to text—not buttons—and maintain a high contrast between the text and the background color. (You can change these settings on the Control Panel in Blackboard: click “Customization,” then “Teaching Style.”)
- Include Alt Text for all images. When adding an image in your Blackboard site, the Alt Text option will be provided in the pop-up window.
- Enter a “Title” when creating hyperlinks; this will be read by a screen reader. Create meaningful link names that describe the link’s function without the context of other on-screen text (i.e., don’t name the link “click here” or simply use the html address).
Things to Think About:
- Is there consistency in the naming and labeling you have throughout the course site areas?
- Are all the weekly units of the course organized in a consistent manner so that students quickly discern the steps they are to follow each week to complete their work?
- Are text, images, and links clearly visible, with adequate spacing?
- Have all areas you have created and want to have ready on the first day been enabled and have those areas not being used been deleted or disabled?
Things to Do at This Stage:
- Check your syllabus and course planning tool—have you created a space for each activity and type of content that you want to include in your course? Are you references in the syllabus and syllabus schedule consistent with the labels and references used in the course site?
- Check to see if all graded activities and assignments have been set up with grading enabled and that a column exists for each in the Grade Center.